bespoke geometry
Stressed Skins

Stressed Skins was an installation designed and fabricated by the Centre for Information Technology and Architecture (CITA) as part of its ongoing Complex Modelling project. The installation design and fabrication processes were motivated by a number of interrelated research interests. The first of these was the investigation of multi-scalar modelling techniques and an aim to better understand their potentials within the discipline of architectural design modelling for generative, analytical, and fabrication-related processes. The potentials of a multi-scalar modelling approach explored here apply to the computation of specific material properties in the context of experimental structural systems and digitally-driven production processes. Fundamental to these interests was the development and implementation of a method for managing data structures within and across the multiple models required for each stage of the supply-chain, from concept to build.
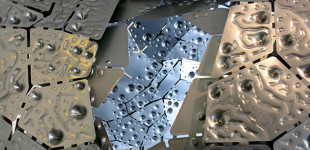
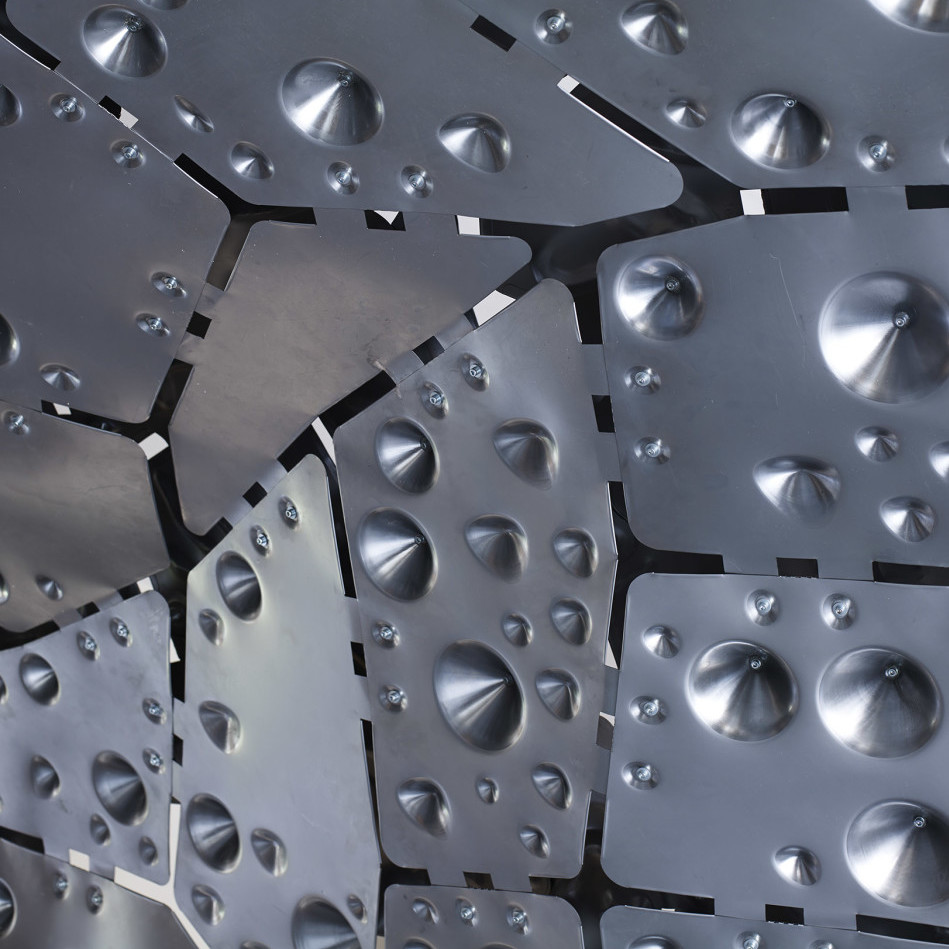
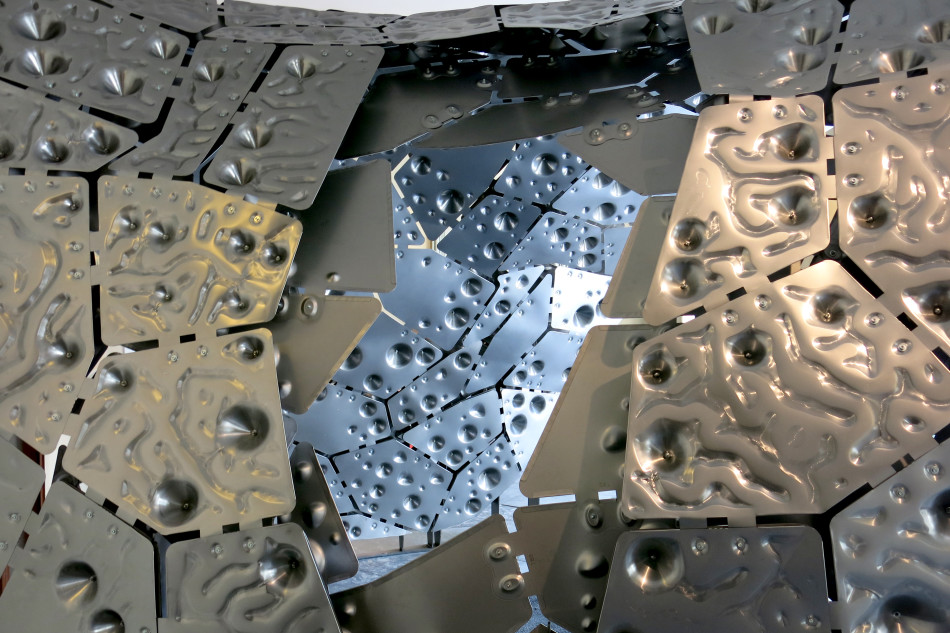
Interior view of the connection detail between two skins comprised on incrementally-formed thin-steel panels
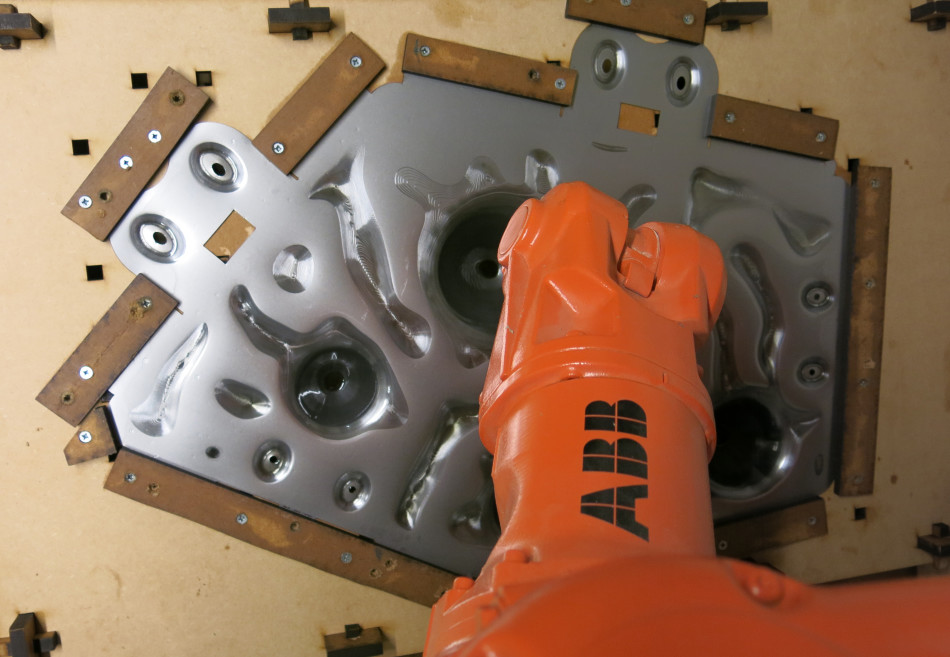
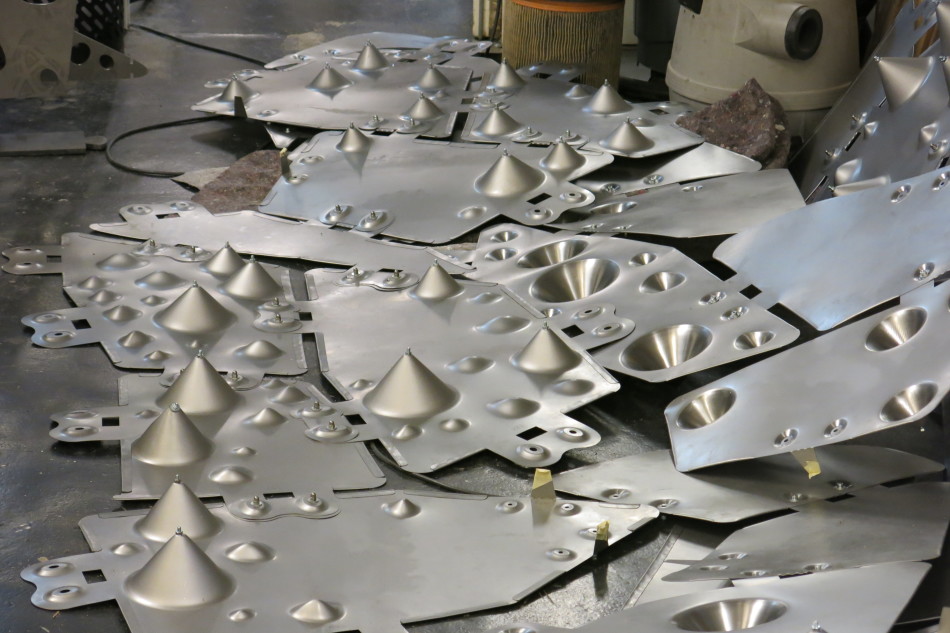
The material and assembly system used was of incrementally-formed, thin-sheet steel panels arrayed within a stressed-skin structure. The technique used was robotic single-point incremental forming (SPIF), whereby the the slow application of a point force along a proscribed toolpath to a thin steel sheet steadily pressed it into bespoke forms. The effects of this process are both geometric, and materially transformative. The geometric effects allow for the steel sheets to be pressed such that, when set against an opposite panel, they are capable of producing both structural depth and connection. This integration of structural depth directly withing the panels allowed for the construction to experimentally investigate the possibility of a frameless stressed skin. The effects of the material transformation are such that strain hardening is locally introduced into the material to different degrees, depending on the depth and angle attained through the SPIF process. These variable material effects and properties were central to the multi-scalar modelling interests, which sought to understand the structure at several scales from the macro to the meso to the micro:
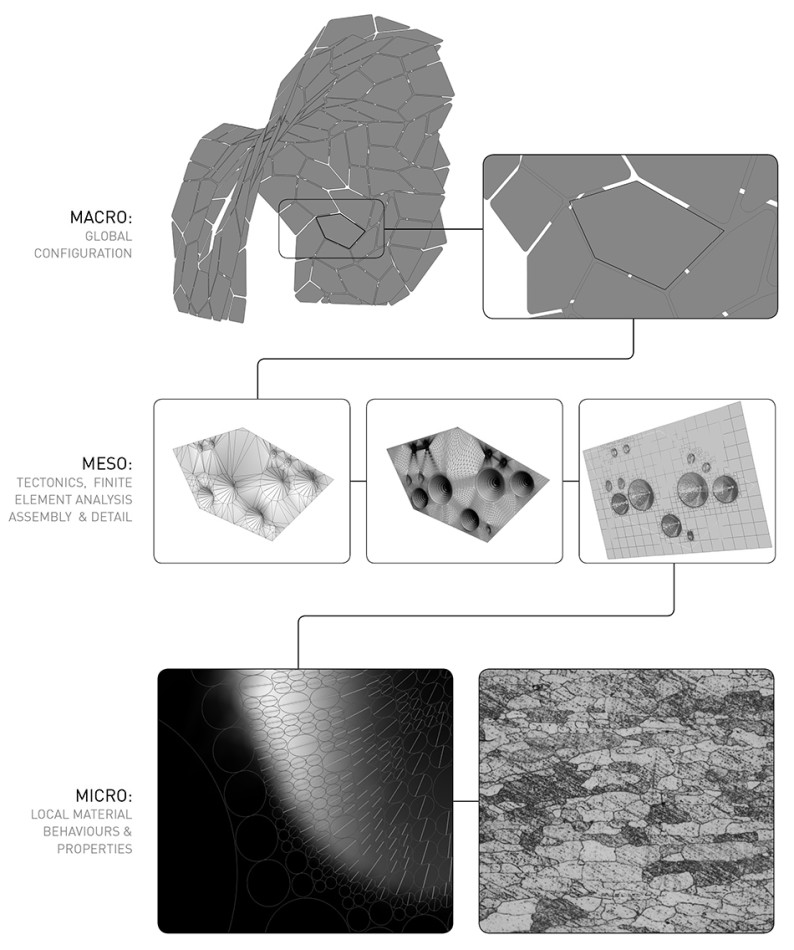 Multiscalar modelling strategy
Model Network
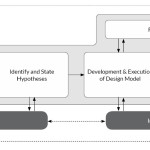
The application of a single-model approach for the managing all of the design interests and processes for such a project is of course, if not impossible, both intractable and inflexible. Stressed Skins was developed with this understanding in mind, and with an experimental aim to explicitly describe a methodology that privileges conceiving of any such project through a model network of heterogenous sub-elements that are calibrated to work both independently and in conjuction with each other, with minimal loss of information between.
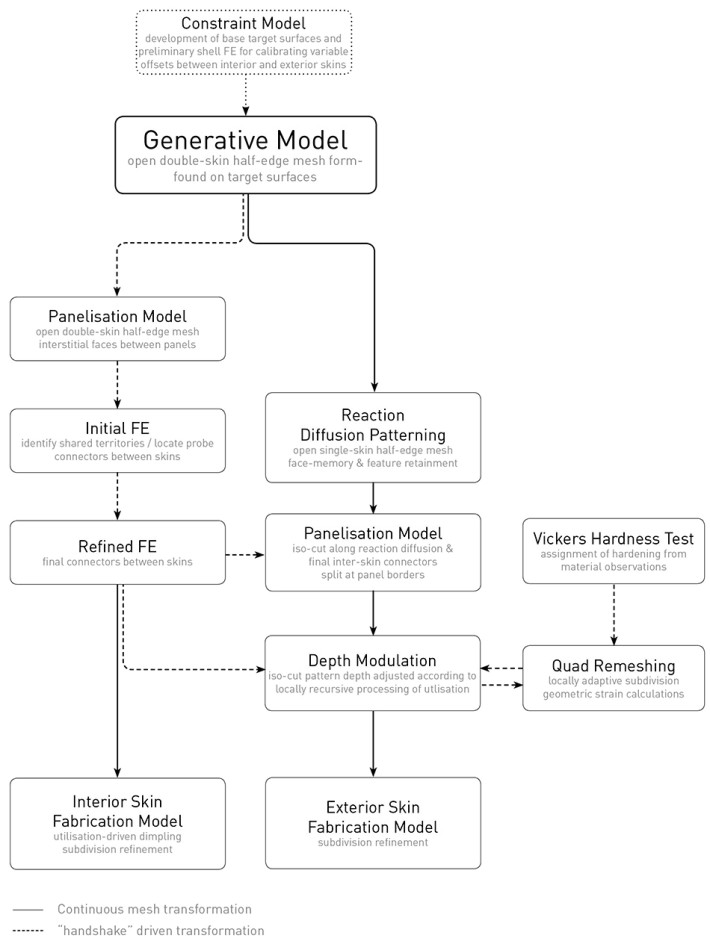 Model network diagram for Stressed Skins
It was determined that a half-edge mesh data structure was best suited to operate as the primary vehicle for geometry development and model traversal. Half-edge mesh data structures allow for the efficient topological reading and transformation of mesh objects. Meshes of many types are routinely used for managing data structures related to both simulation and analysis within strutural assemblies, but half-edge meshes are particularly well-suited to support the remeshing processes that are central to a multi-scalar modelling approach. Indeed, careful management of such a data structure allows a designer to effectively couple it with key information that persists across these different scales throughout the different stages of the design process. Throughout this project, the Plankton half-edge mesh library for .NET developed by Daniel Piker and Will Pearson was used for all mesh modelling, and the insight and direct support of both Daniel and Will in this regard was indispensable to the success of the project.
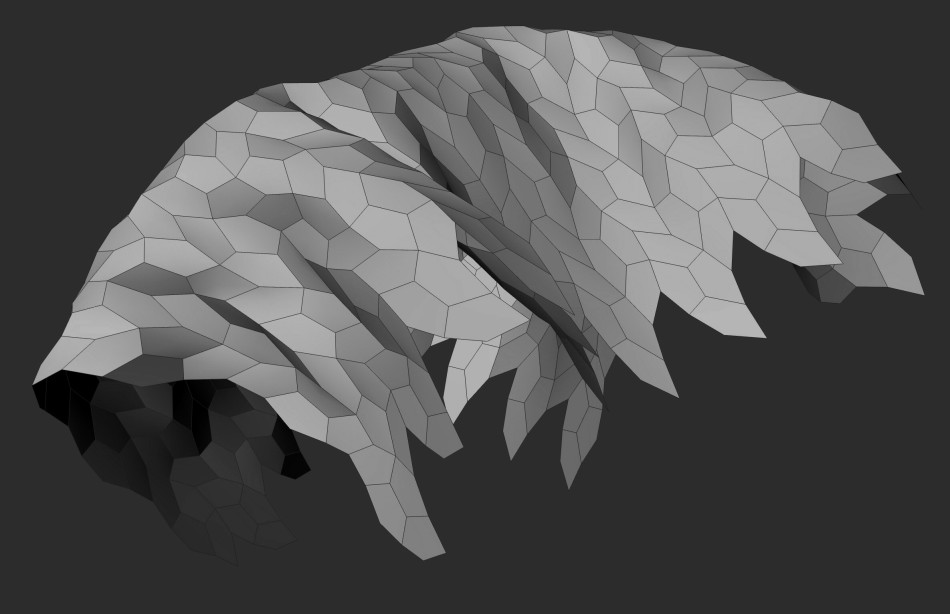
Pentagonal Tile Draping
Central to the network model ecology was the development of both new implementations of existing computational approaches, and the formulation of of novel techniques and tools for form finding. These all took advantage of different capabilities of half-edge meshes, and in particular their utility in coupling geometry with multiple layers of semantically rich data about the assembly system. Through the development of these instruments, the model network became capable of producing coincident understandings of coarser topological relationships between individual panels in relation to each other within and across skins, granular understandings of local material behaviours related to geometric transformation within each panel, and highly refined geometries for defining digital fabrication drivers and toolpaths.
- Reaction Diffusion with Stepped Iso Cuts
Digital Probes & Tooling
The design modelling itself began with a simple constraint model, which reflected the most top-down component within the overall process. The installation was developed for the entrance of the Danish Design Museum in Copenhagen. This strictly limited the space available for the final piece, and also called for it to effectively support the circulation requirements of a busy foyer. A parametric model was used to specify the base geometry, with control curves managed directly by the design team. This constraint model was also used for preliminary structural analysis to pre-calculate the variable target depths for the final assembly. The assumptions used here were that the higher levels of material utilization in an FE analysis of the target form as a simple thin-steel shell would suggest preferred areas to maximize potential depth between the two skins.
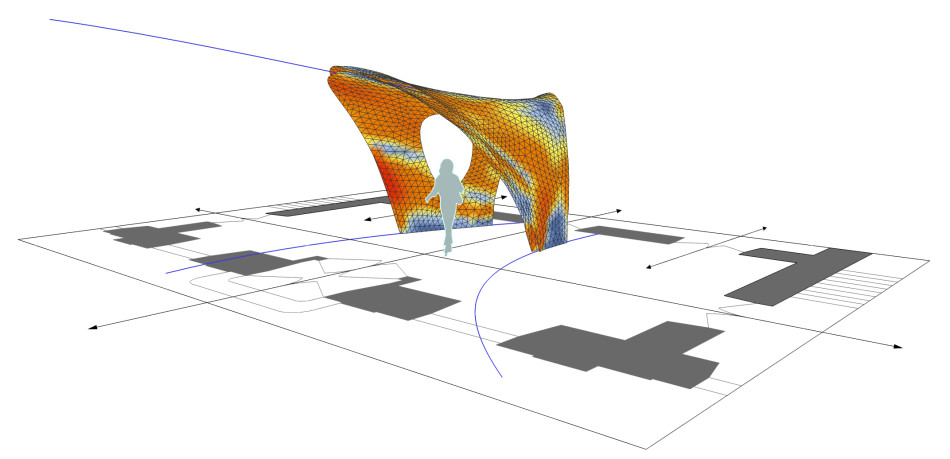
Constraint model reflecting target design surfaces and preliminary FEA for Stressed Skins
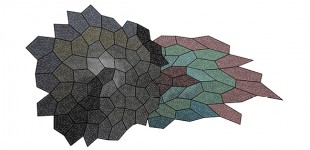
With the target surfaces defined, a generative algorithm was used to array a double skin of pentagonal tiles across them. This algorithm was deployed through the Grasshopper plug-in and .NET library Kangaroo2, a physics-based simulation engine developed also by Daniel Piker. Here again Daniel’s support and guidance were instrumental to the project, with him making a beta version available to the design team from an early point in project development, and his providing direct advice and support for its effective deployment. The algorithm relied on a series of custom scripted “goals” for first applying to the doubly-curved target geometries panels that realy on a tiling strategy that only truly works on a plane, and then deforming each face into a planar form, while each continued to strive for geometric fidelity to the base tiling schema. The following animation describes this process of panel generation and planar refinement.
Recursive Double-Skin Panel Generation, Planarisation & Refinement
With the global panel array defined, it became essential to identify “shared” territories between the interior and exterior skins where the primary connections for achieving stiffness and structural depth could be deployed. These shared territories reflected spaces where inter-skin connection cones could be asserted from both skins without interfering with the details necessary for stitching together the intra-skin connections between panels within each skin.
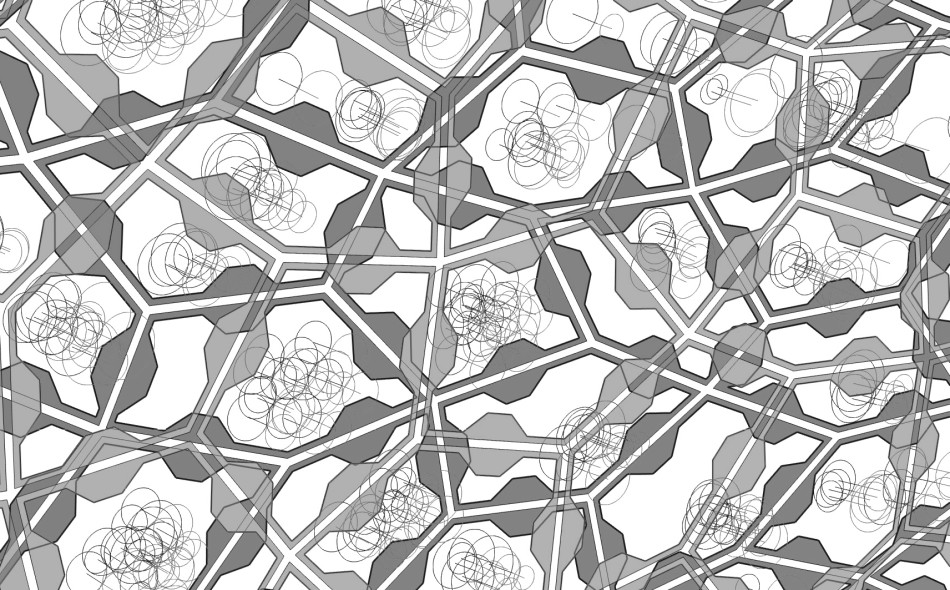
Identifying Potential Territories for Connection Points between Skins
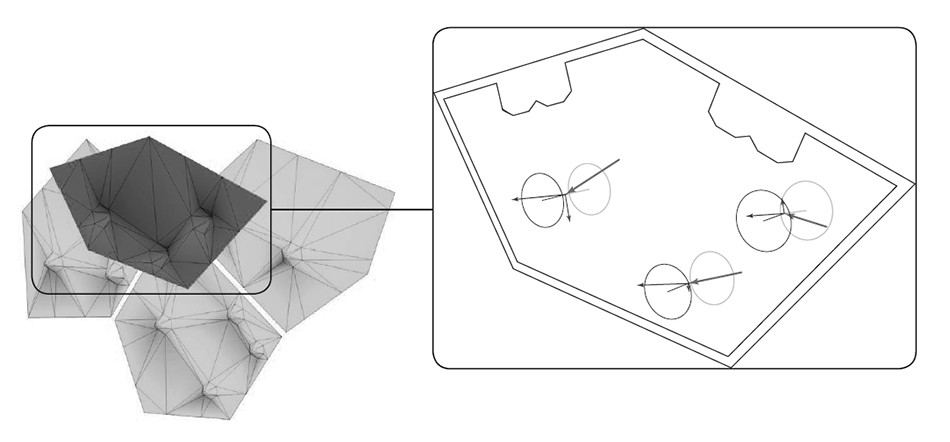
In fact, to assist in this process, the execution of the generative model included a custom goal whose affect on the simulation was to “push” edges on the interior skin away from edges on the exterior skin. During prototyping processes it became clear that the overall geometry of the assembly created “seams” in high curvature where both the interior and exterior skins would form creases roughly normal to each other. This sequence of skins created “hinging” moments, as described in left image of the following diagram. By pushing the edges away from each (where possible) the final assembly reflected a higher concentration single panels on the interior skin connecting to multiple panels on the exterior skin, helping to minimize any global hinge effects.
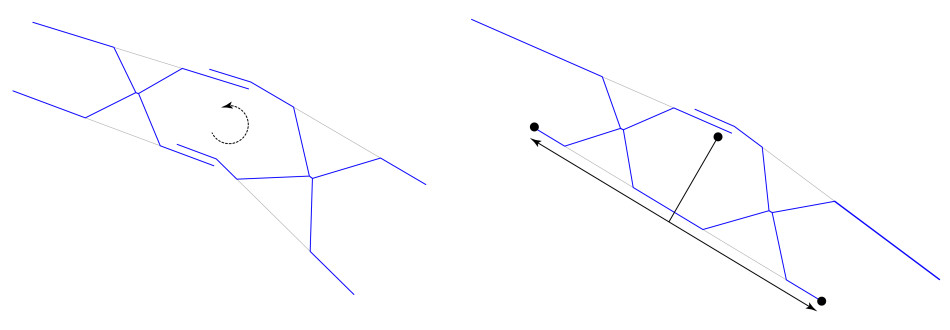
Custom goal that seeks to minimise “hinge” conditions in the model
Candidates for final locations of the inter-skin connections were determined first according to the previously described process of identifying “shared territories”between both skins, and secondly through the deployment of two FE models. All of the finite element analyses performed through the project were executed using the Karamba plug-in for Grasshopper. And here, Clemens Preisinger (the lead author of Karamba) and his colleague Robert Vierlinger from Bollinger + Grohmann provided instrumental support in formulating and developing the first of these global FE models such that they would describe our material system with as much fidelity as possible. This first model tested singular “probe” connections, one for each available shared territory identified.
Small area showing the initial FEA and resulting shear forces at “probe” connections between the interior and exterior skins
Then, the results of this FEA informed a refined distribution of inter-skin connection elements. Here, inter-skin connection cones were located in as great a number as possible near high-shear forces, and aligned perpendicular to them.
Left: Redistribution of inter-skin connection points based on initial FEA, Right: location of intra-skin connections and a dimpling tectonic
Early in the process it was determined that the two skins should have different tectonic expressions, and could effectively support a process of experimental iteration even within the scope of a single project. The inner skin was developed first. For it, the second, refined FE described above also drove the secondary patterning applied to each panel. Here local concentrations of high utilization in each panel were used to locate a series of dimples to be formed. Higher areas of utilisation resulted in a higher concentration of deeper dimples:
Interior skin connections and dimple tectonics
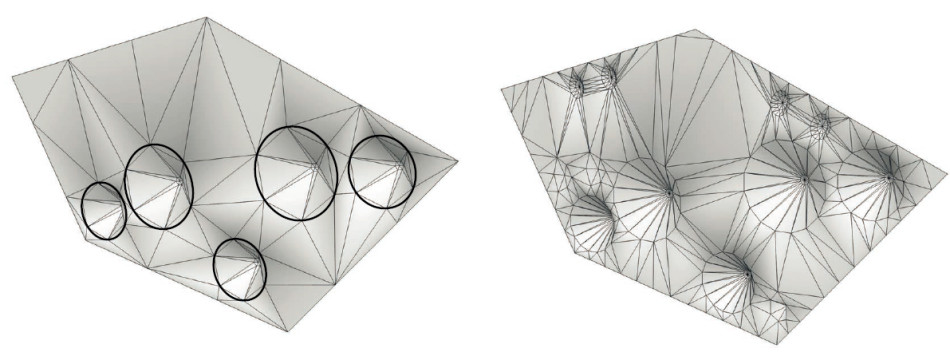
The ambition for the exterior panel patterning was to more thoroughly investigate the implications and potentials of a multi-scalar consideration of the material assembly system. This took full advantage of many of the adaptive remeshing approaches and implementations that have been shown before, such as for more standard mesh subdivisions with asserted creases, adaptive re-meshing with multiple scales of topology retained, and locally adaptive, multi-resolution mesh subdivision.
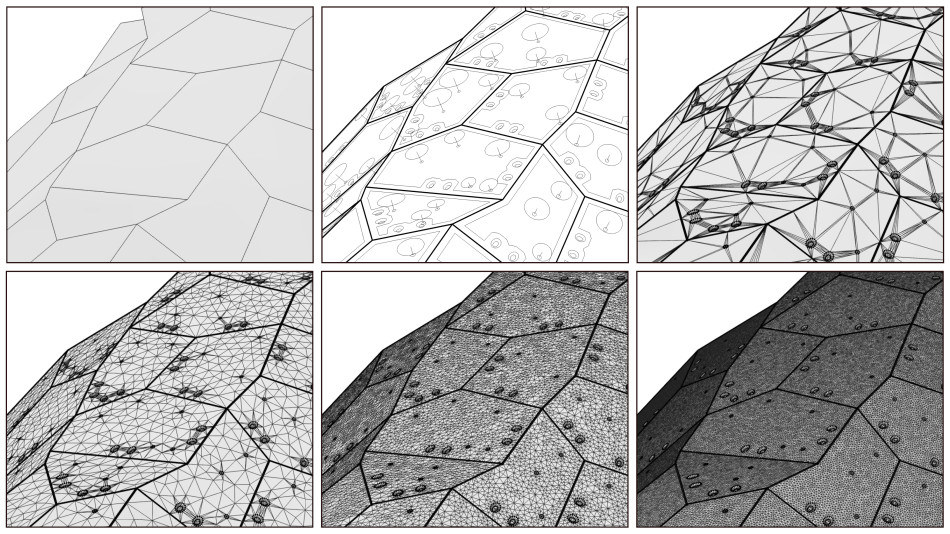
The image sequence above describes for the exterior skin the preparation of the generated pentagonal mesh for asserting connection details and applying the tectonic patterning. Into the coarse mesh, first offsets and features are defined, and the topology is inititally refined to reflect locations for connection details both within the exterior skin, and across to the interior skin. Then this mesh is refined to a resolution suitable first for the application of the global reaction diffusion patterning system that was employed for the exterior surface, and later for more detailed FE analyses to be performed on each panel individually.
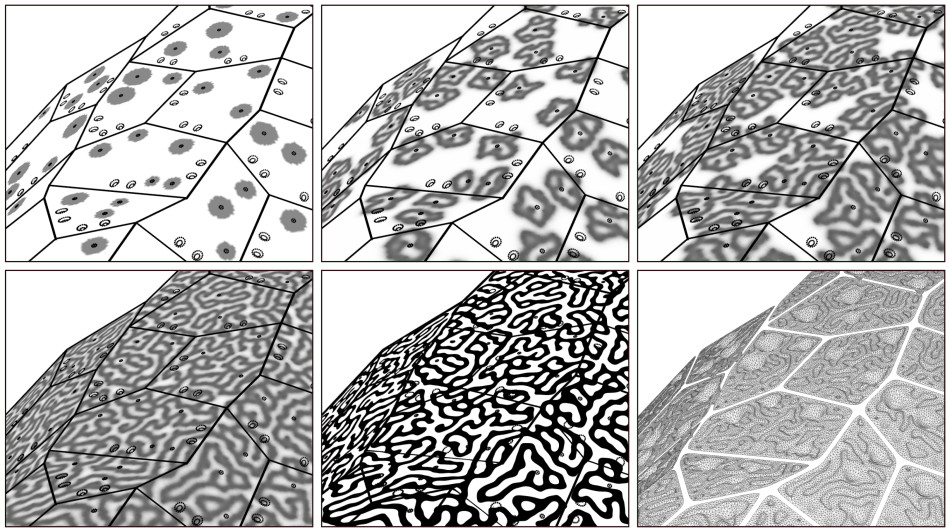
A reaction diffusion pattern was selected as the basis for the exterior tectonic based on the isotropic nature of its overall configuration: the idea was that with geometric stiffening introduced into each panel through the SPIF process, such a configuration would be better suited to resist bending in multiple directions. The above images illustrate the reaction diffusion algorithm being run on the target mesh, with initial samples set at the inter-skin connection locations. Once the pattern has found equilibrium, the mesh is split at a target ISO level across the entire mesh, and the formable areas (comprised of both the inter-skin connection cones and the reaction diffusion patterning) are defined. The continuous mesh is further discretised into each individual panel.
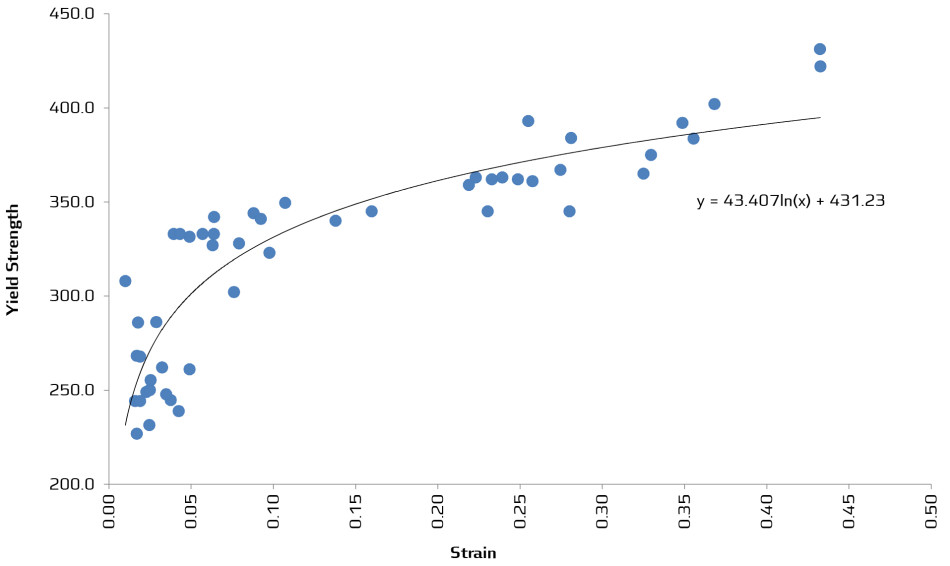
Strain – Strength readings from formed samples using the Vickers Hardness Test
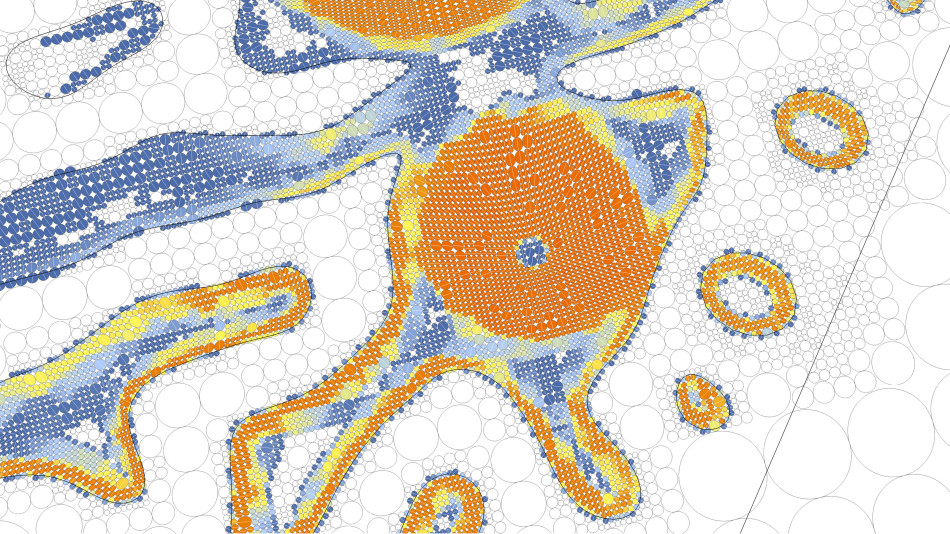
The ambition to embed variable and highly localized material intelligence into the modelling process across multiple scales was pursued in the next step. First of all, through the efforts of Christopher Hutchinson and the Department of Materials Science and Engineering at Monash University, a series of tests on the impact of the SPIF technique on the steel’s underlying material properties were executed. Using the Vickers Hardness Test on a series of samples, we were able to derive a relationship between the local strain deformation in the material and its plastic hardening.
Local strain hardening with principle strain directions in a multi-dimensional quad mesh (click to enlarge)
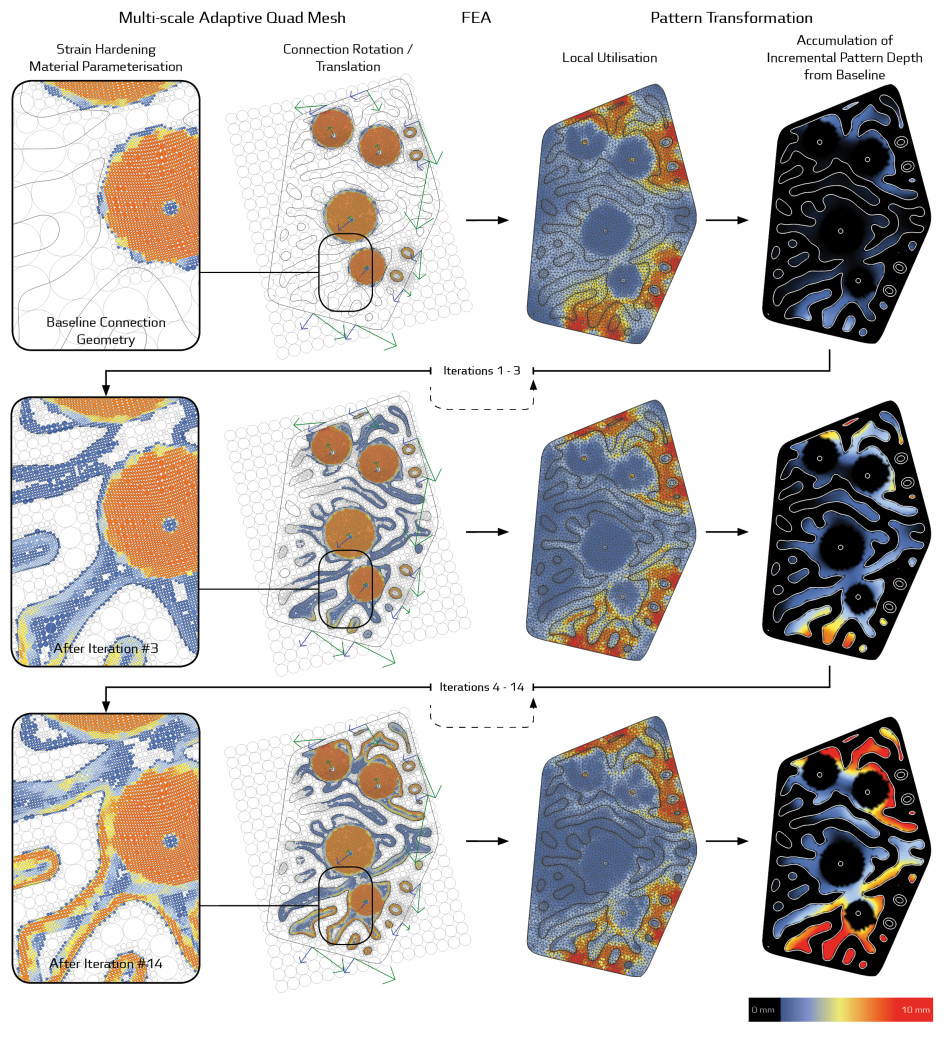
Using these observations directly, each panel underwent a series of FE analysis and geometric transformations that aimed to both locally reduce the utilization by introducing strain hardening through the SPIF process, and introduce incremental geometric stiffness and a greater capacity to respond to bending forces. A recursive process used the displacements and rotations of connection points from the global FEA and applied them as moving supports for each panel. Each individual panel’s materiality was differentiated for each face in order to account for the effects of strain hardening. As a baseline, strain hardening was calculated for the known connection points: these were geometries that had been established through the global configuration of the installation. Then, using the reaction diffusion “formable territories” ascribed in the previous remeshing process, small amounts of incremental depth to this baseline geometry were introduced in response to proximity to high levels of material utilisation. At each stage, as more depth was introduced into each panel, local utilisation was reduced through strain hardening and bending energies were increased through geometric stiffening. Strains were calculated using a multi-dimensional quad remeshing technique that allowed for adaptive grading of mesh resolution. The process was iterated to accommodate multiple considerations: first, to address high levels of utilisation and improve the performance of each panel; second, to achieve a preferred level of archiectural expression in the pattern; and thirdly, in consideration of the total tooling time that would be required to fabricate each panel.
Multiple iterations of incremental depth being introduced within individual panels
Fabrication
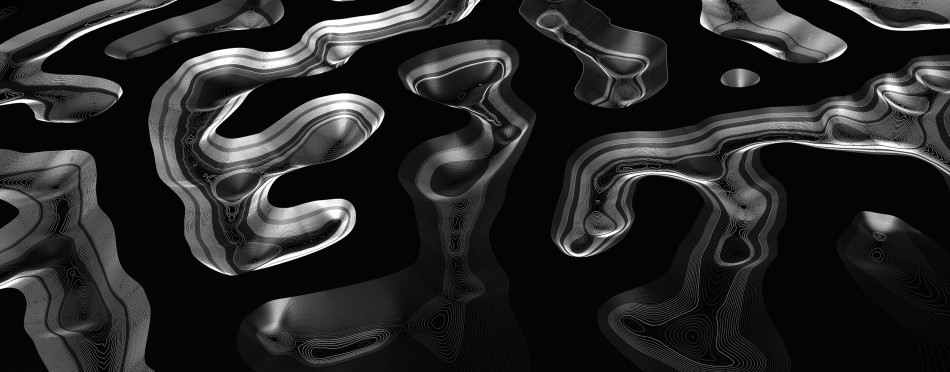
Each last panel mesh was then further subdivided and refined to achieve a requisite resolution for fabrication. The variable geometries within each panel posed a challenge to creating toolpaths that were properly sequenced. For the tooling to work properly, the SPIF process needed to inscribe features into the steel always from the top of the surface downward in step-wise process. The following image illustrates how different depths within different individual features of the panel were used to create and sequence toolpaths such that the the shallowest areas were worked first, and steadily moved through each grouping according to its relative depth.
Toolpath groupings (click to enlarge)
The fabrication of each panel relied first on the laser cutting of the profile edges for the pattern and features to be inscribed on the blank steel sheet. These were unique for each panel, and were set into a base “box” which was located underneath the robot arm. All of the toolpath development and applications were managed through the Grasshopper plug-in HAL, developed by Thiebault Schwartz.
Robotic Tooling

Final Patterning
Panel setting, forming & finishing
Installation
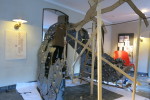
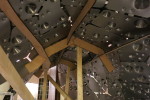
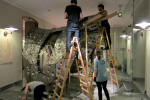
Installation was then a fairly straightforward process. Each panel had been fully configured with “awareness” of its location within the overall assembly, and was easily labelled. In effect, the connectivity of each panel was self-jigging. A series of strips were pre-assembled to facilitate a rapid installation, and a simple underlying scaffold was erected to provide temporary support as the elements went into place. The strips were identified through a simple analysis of sequencing elements on the 3D model.
Pre-assembled strips
Installation
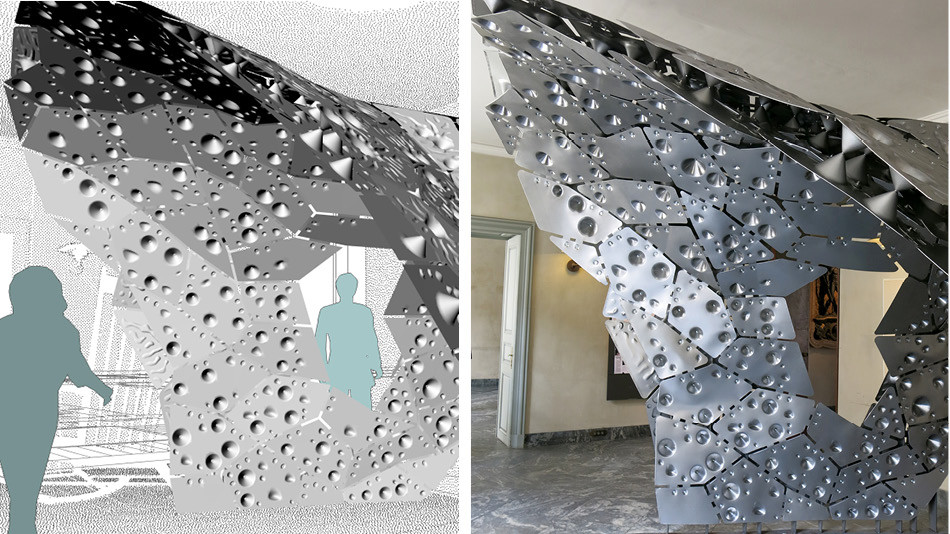
From model to build
